Last time I showed you how to make your own IO-cover, in this guide we…
How to Mod: Making a IO-cover
When I build my custom projects, I try to go really deep into some details, sometimes I painted caps on the motherboard because they were the wrong color, stuff like that.
One thing that I always thought were “ugly” is all the IO-ports on the motherboard, you look on the motherboard and all you see is these “boxes”. On new more expensive motherboard the manufacturers started doing covers for that. But thats mostly on the premium models.
In this guide I will show you how you can make your own, either from aluminium or acrylic.
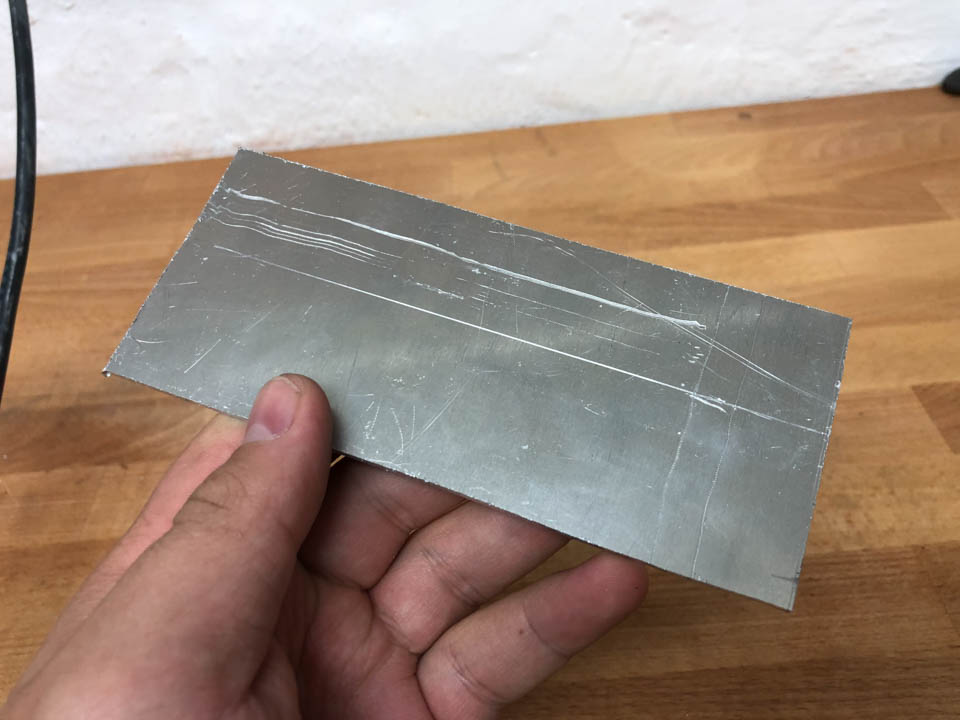
I have made IO-covers before, both with aluminium and acrylic. The technique is a bit different from the two materials, but how you measure it is the same. In this guide I will show how I make one in 2mm thick aluminium, however I will also explain how you do every step with acrylic.
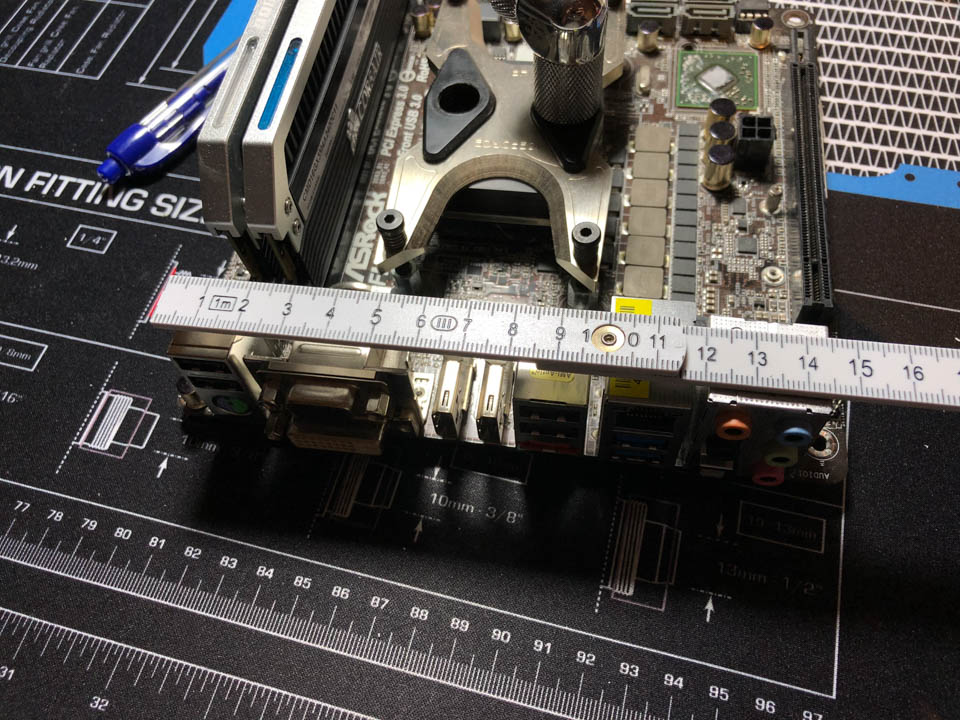
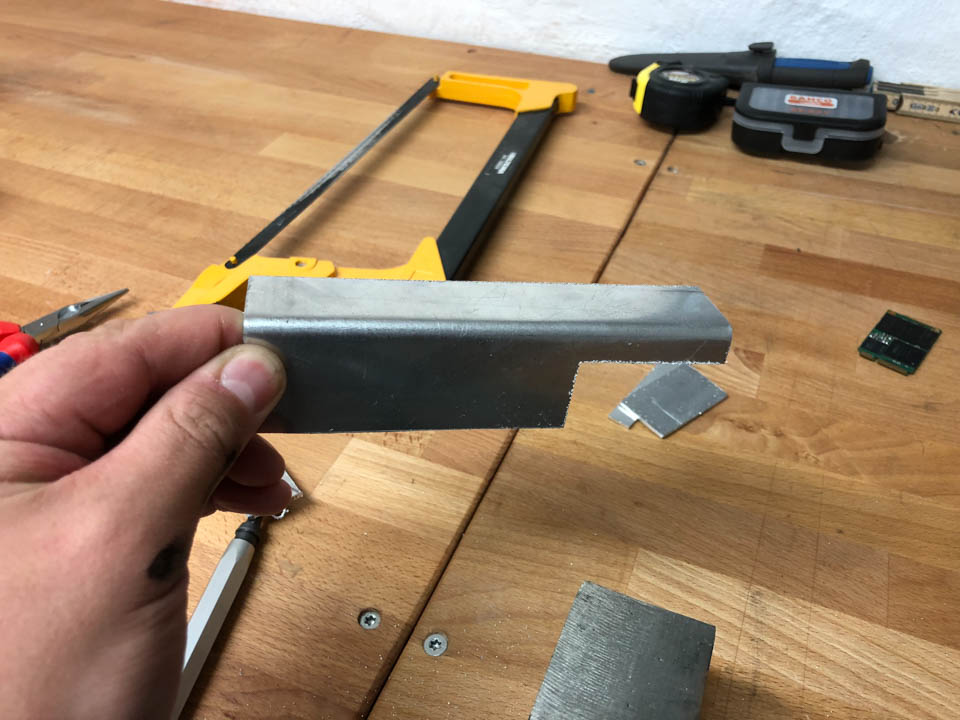
Lets start by measuring how big the IO-cover is going to be. First of all we have to start with measuring the length, that is pretty straight forward, just measure from the outside of the port on the top of the motherboard down to the outside of the last port on the bottom of IO.
For the width we need to measure the widest port plus the one with the most height, put those measurements together and add 2-3mm for the bend. If its to big after the bend it is easy to file it down.
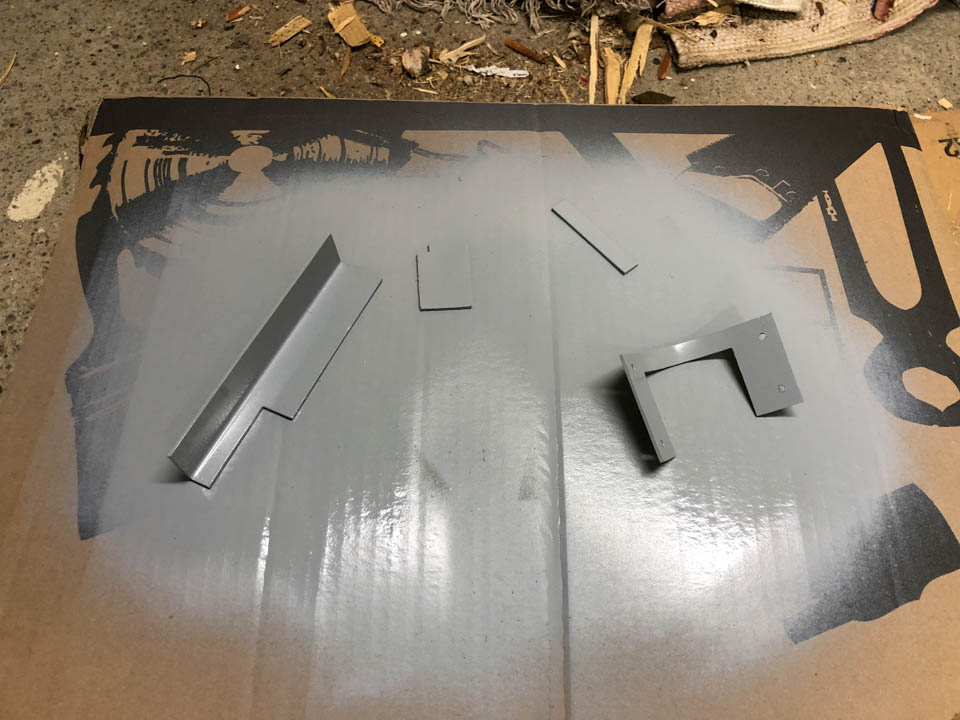
Next thing to do is to mark out the measurements on the aluminium, or acrylic if thats your choice of material. To make the bend easier to do its a good idea to mark out where the bend is going to be.
For cutting out aluminium I am using a jigsaw and medium-fine blades, for acrylic I recommend really fine saw-blades as it will make it easier.
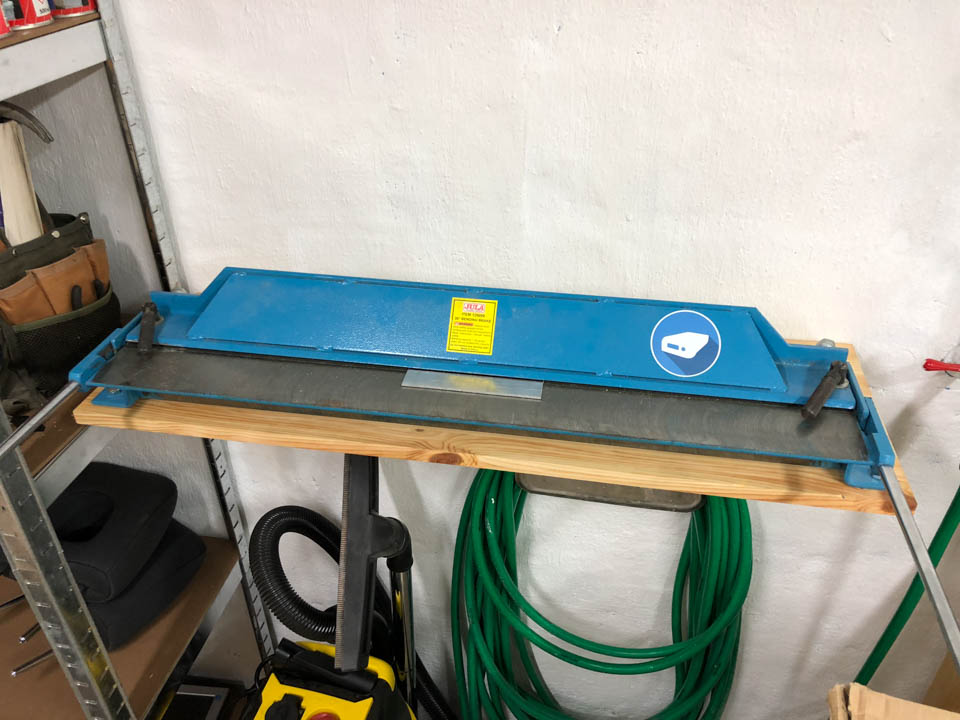
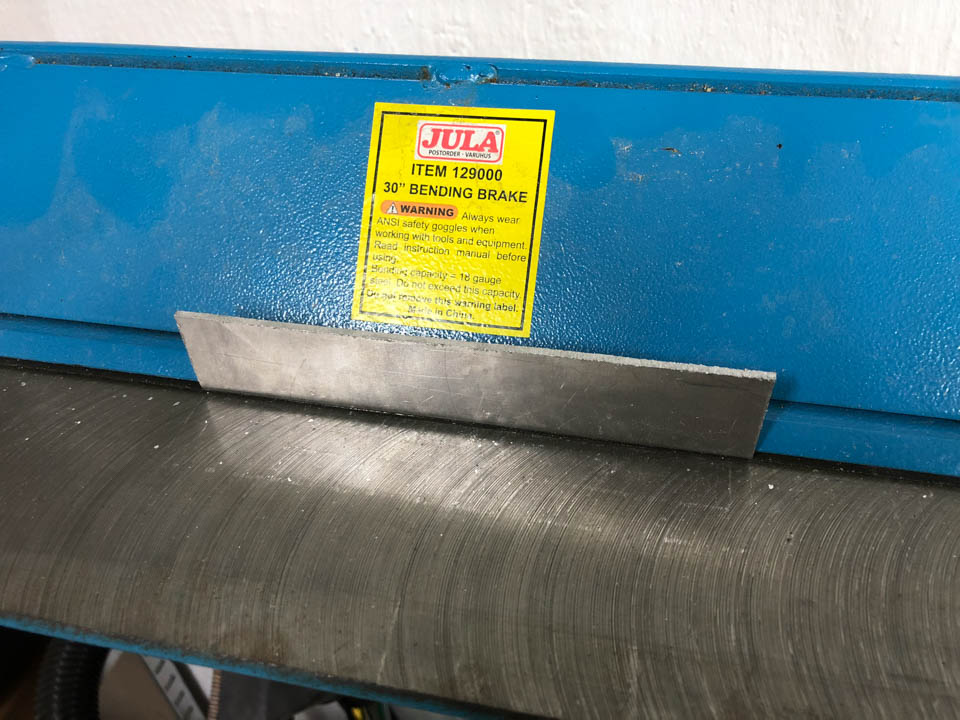
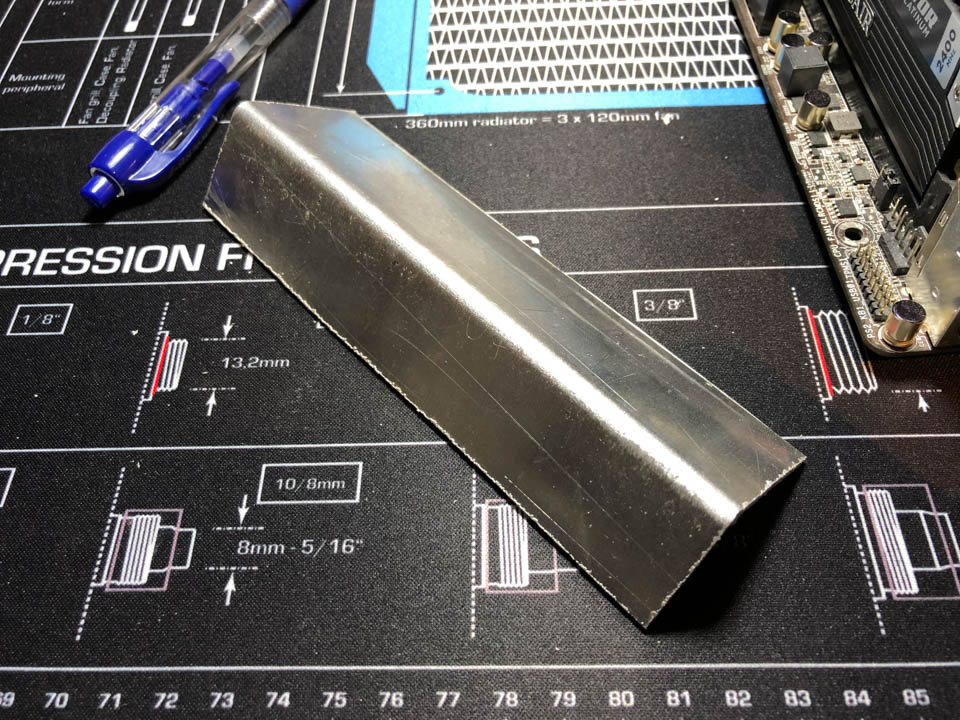
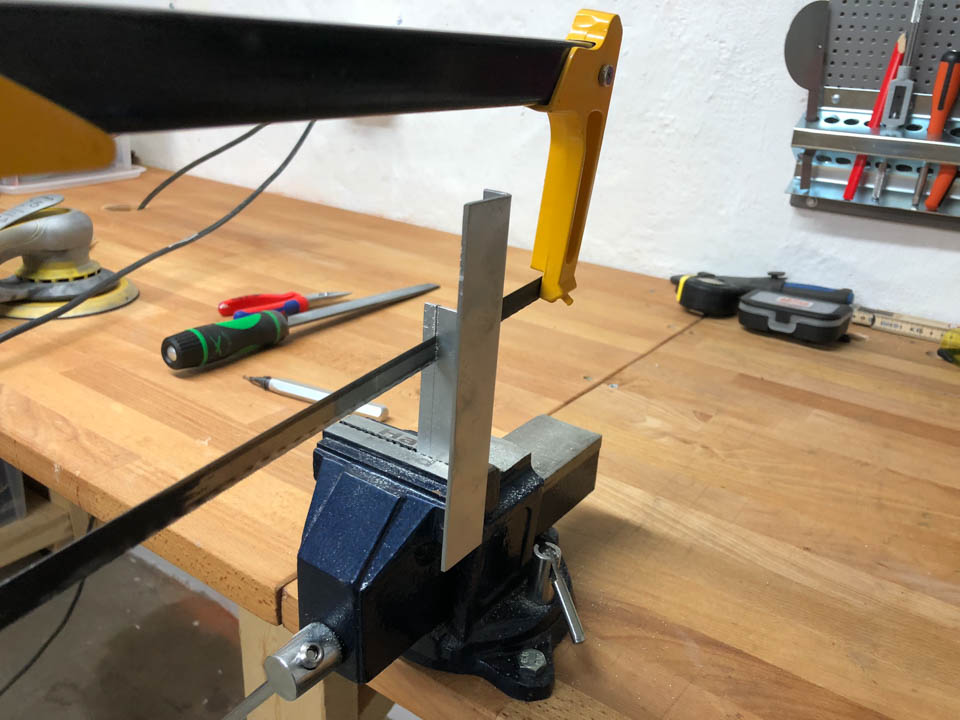
Next up is the bending part. This is where the technique is different for aluminium and acrylic, and this is why I use aluminium as it is easier. I have a sheet metal bender that makes it very easy, especially if you marked out where the bend should be, just insert the aluminium piece, line it up and make the bend.
For acrylic on the other hand you need a heatgun to heat up the acrylic so it is possible to bend it without it breaking. What I have done for this is to clamp the acrylic down to the edge of a desk for example and then using a heatgun and heat the acrylic up slowly until it is flexible enough to be bent.
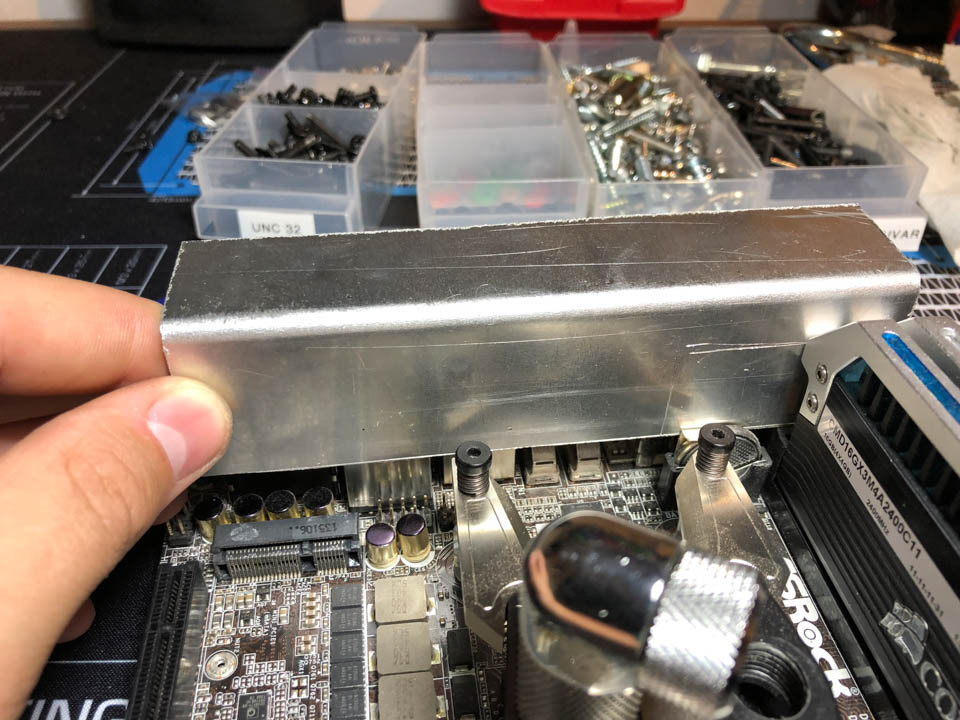
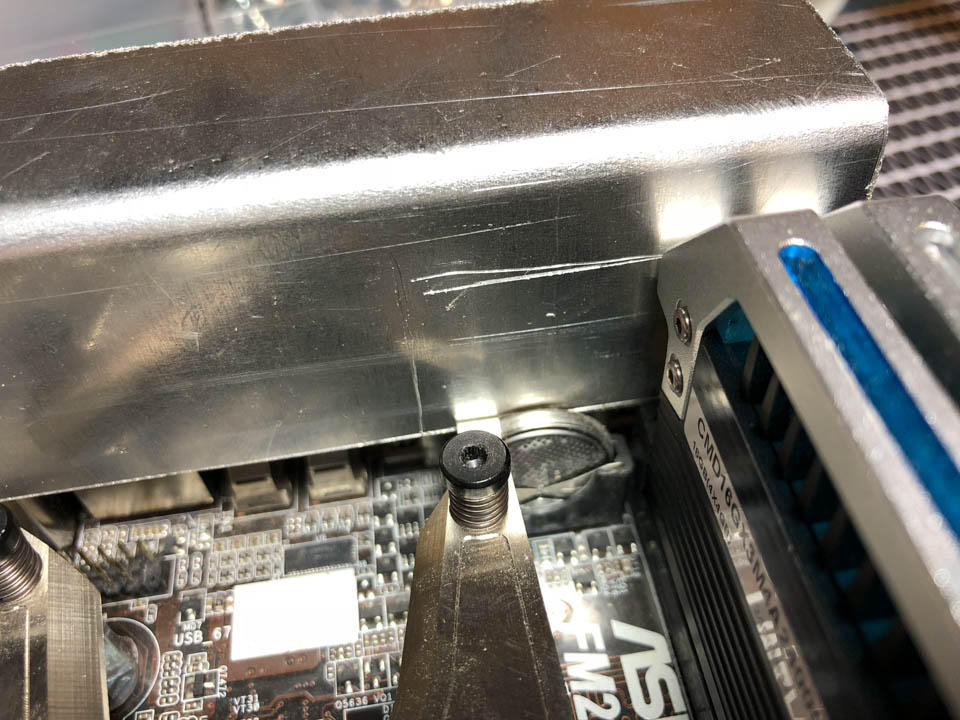
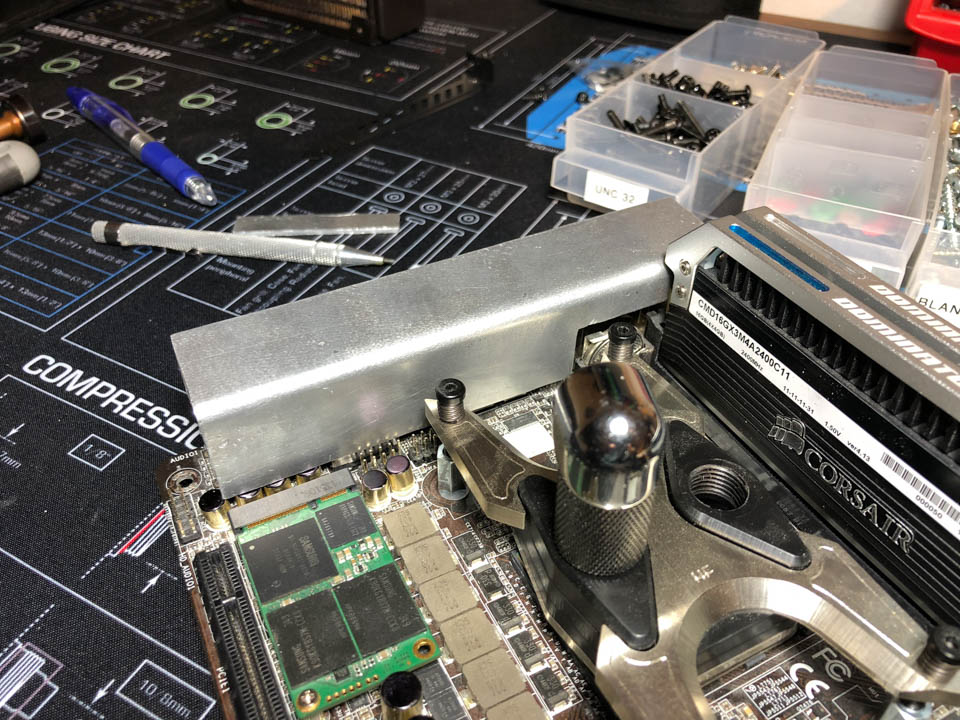
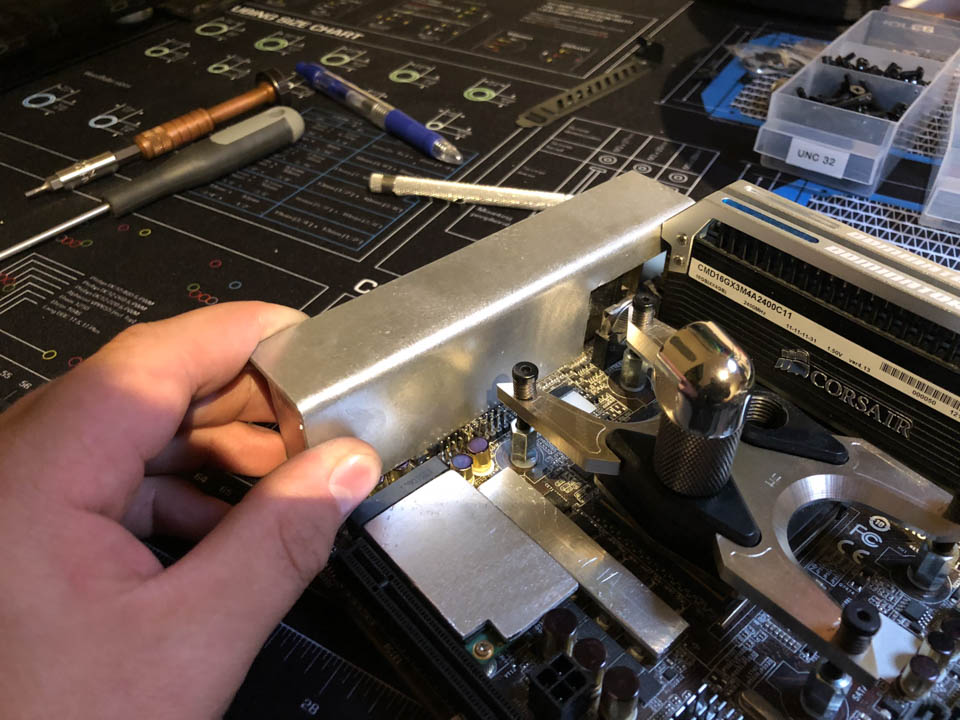
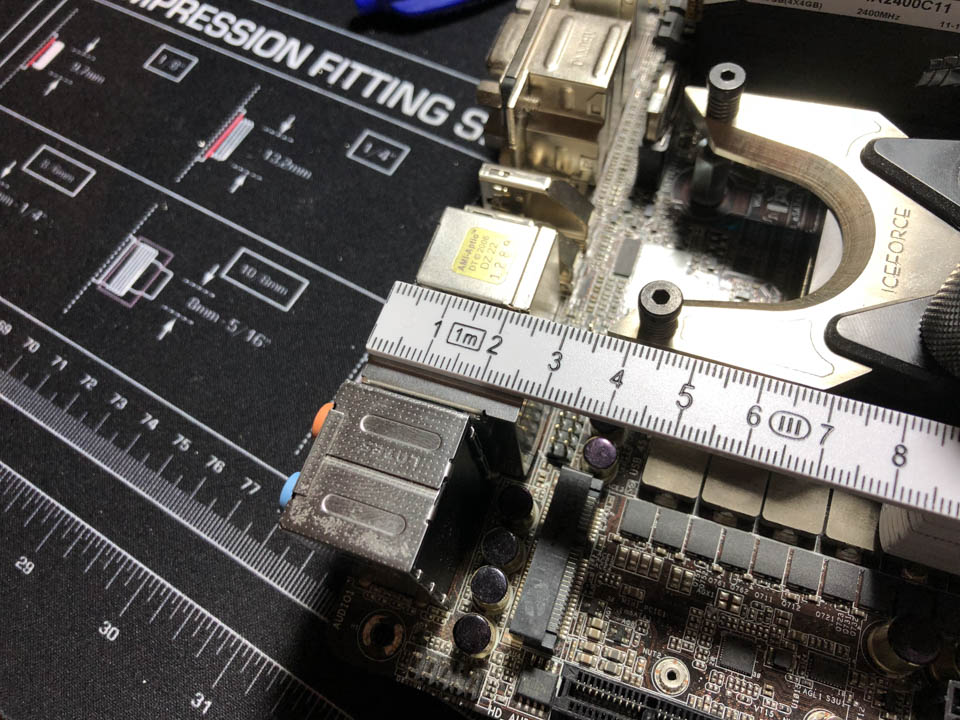
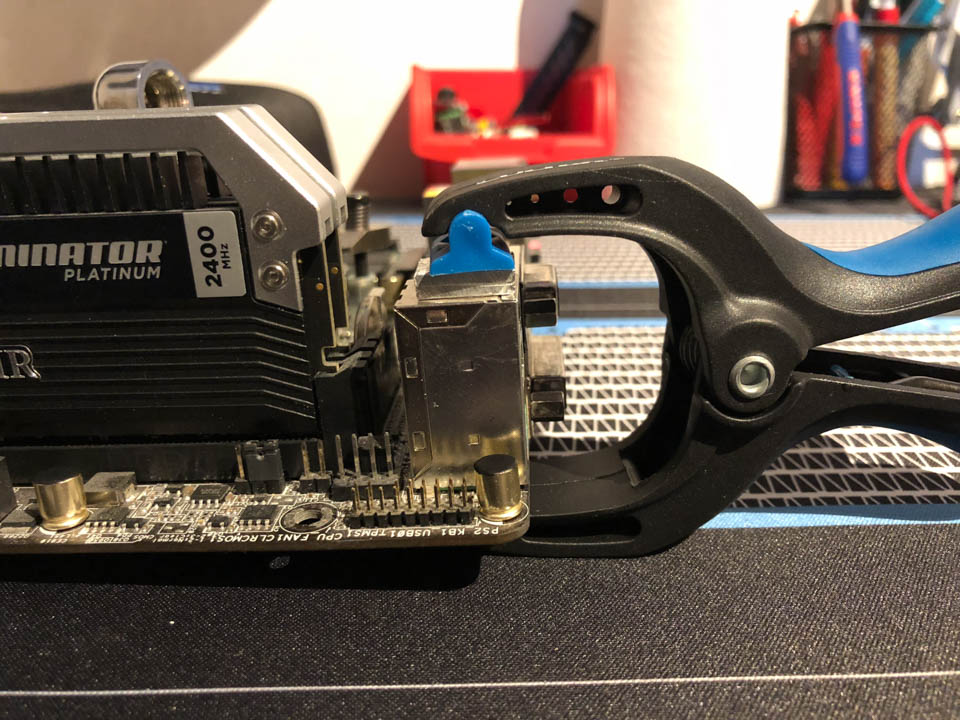
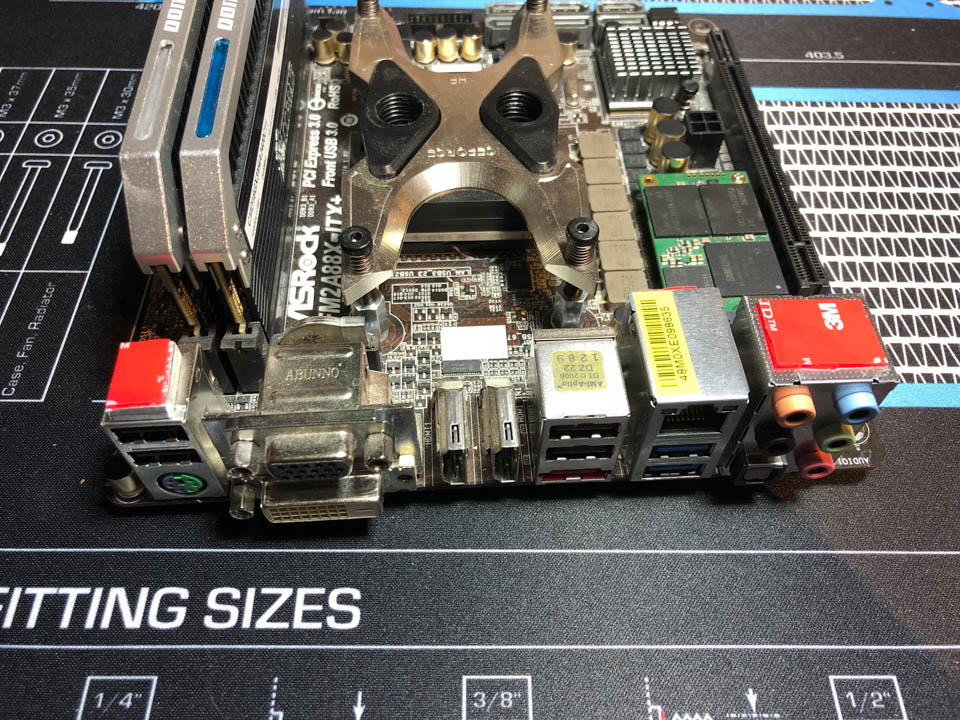
Depending on your motherboard you can have different parts interfering with the IO-cover, everything from capacitors to different ports. So what I do after I bent the IO-cover is to line it up over the IO-ports where I want it to be, and mark out where different parts is interfering with it. Then it is easy to do small cut out for it so it fits better.
Next thing to do is to start filing down the edges and sides so the IO-cover fits perfect and is not interfering other parts.
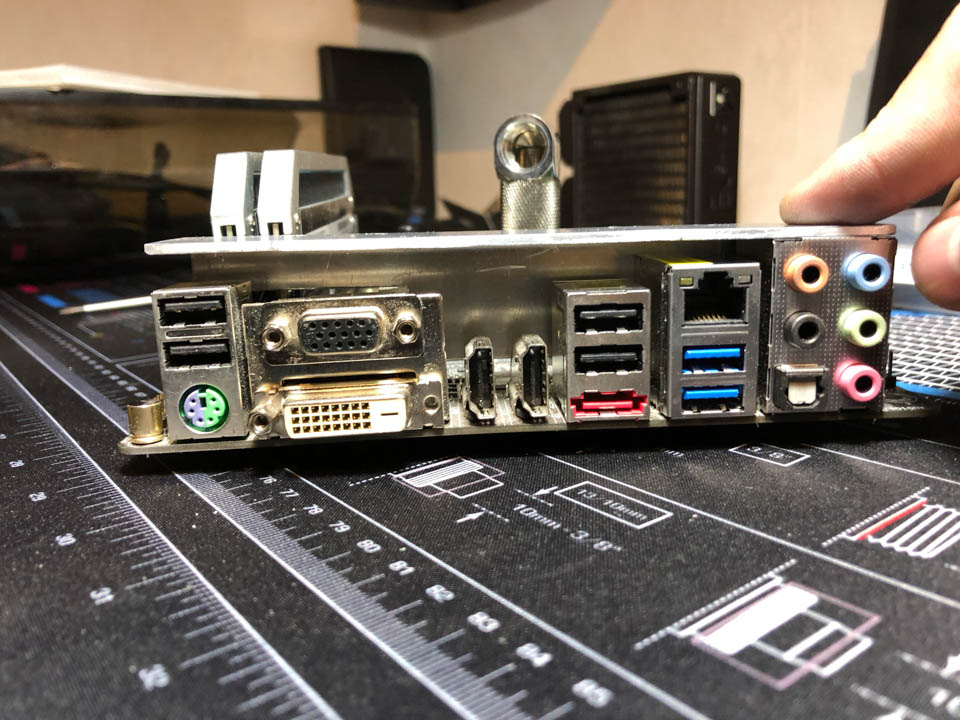
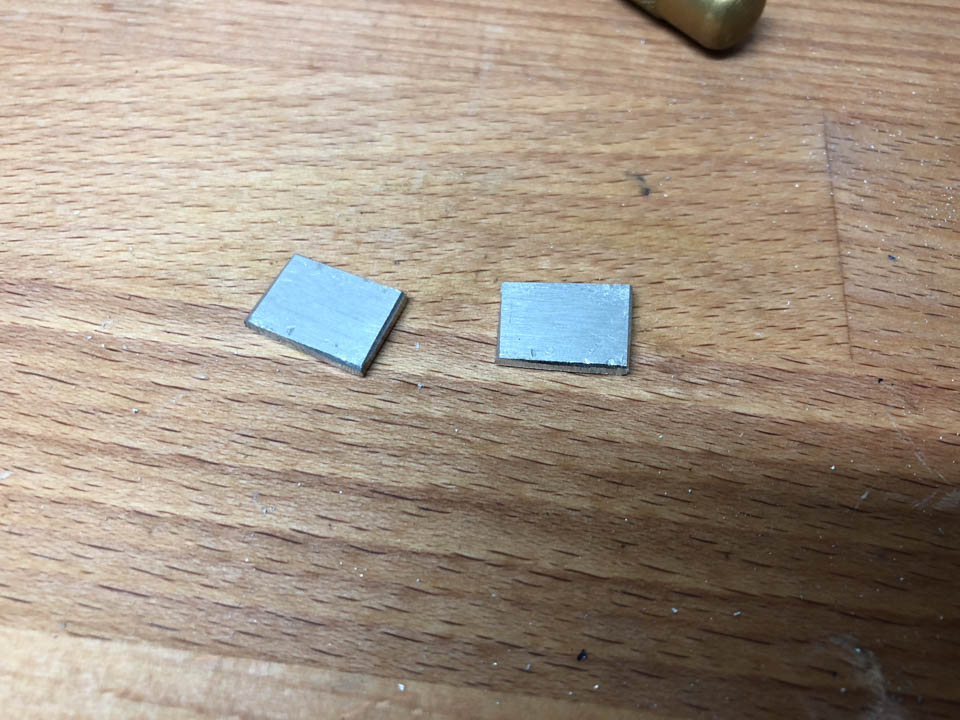
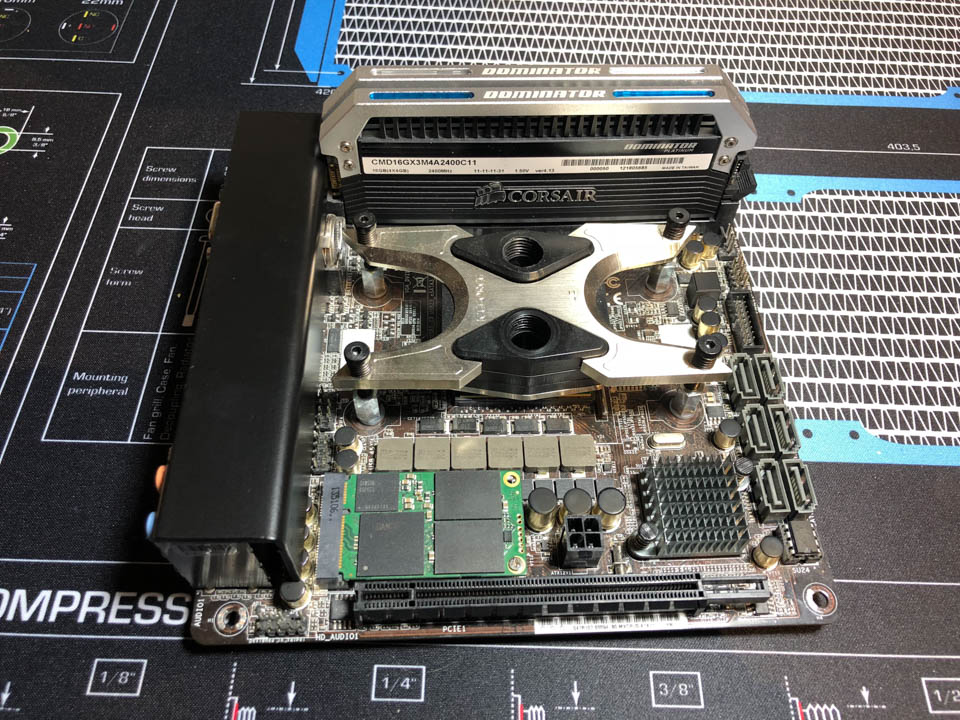
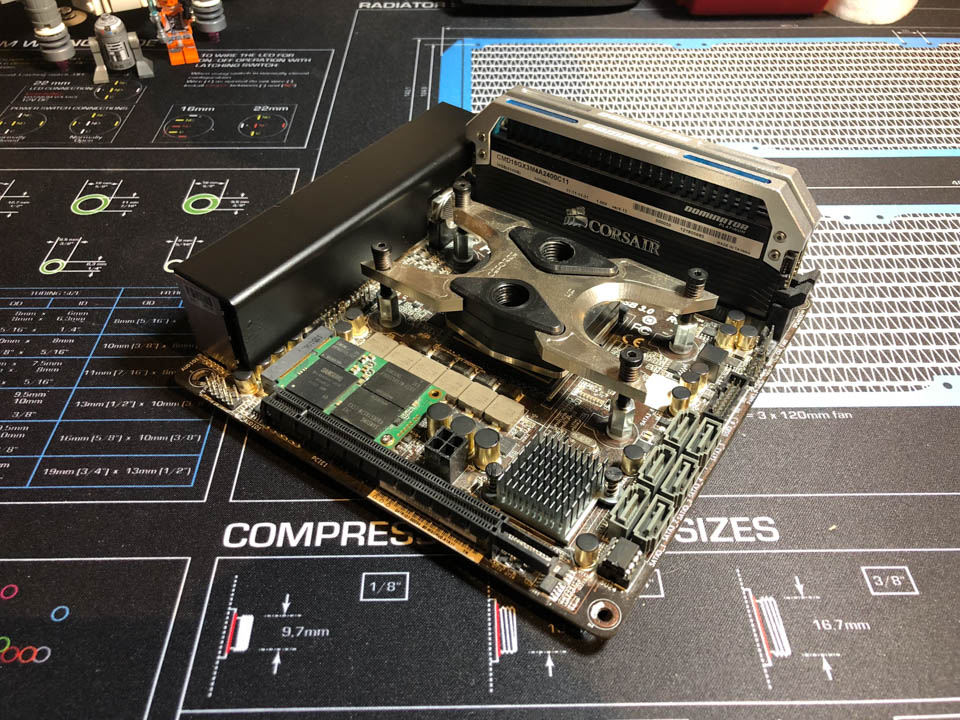
As you see on the first photo above it will not be possible to mount the IO-cover as the USB-port to the left is to low. What I did to fix this was to cut out two small aluminium pieces, glue them together and file them down and at last glue that piece to the top of the USB-port.
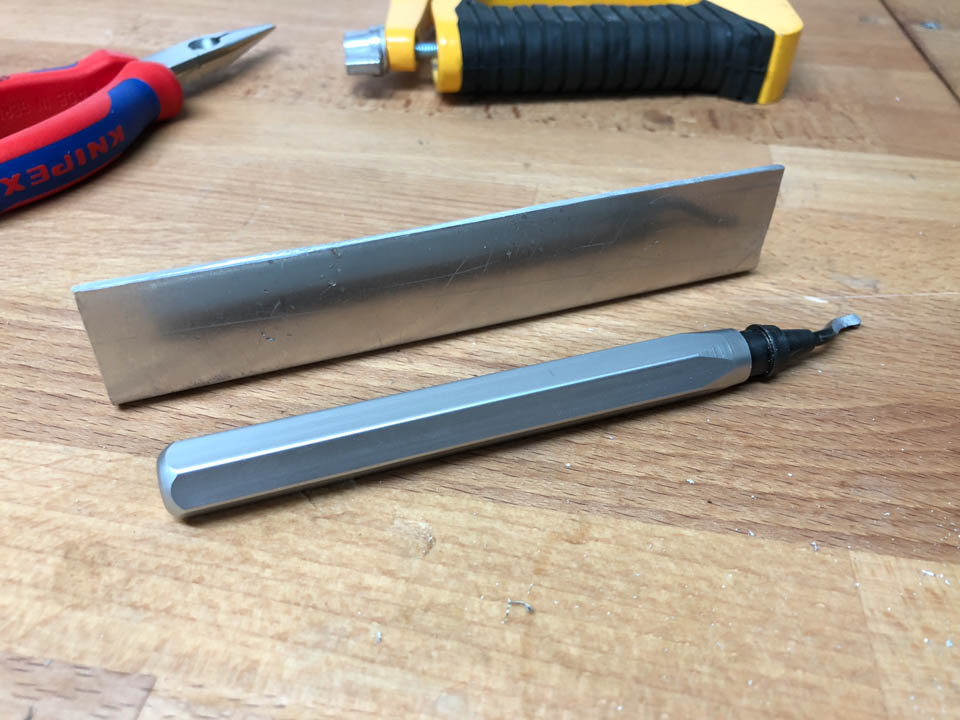
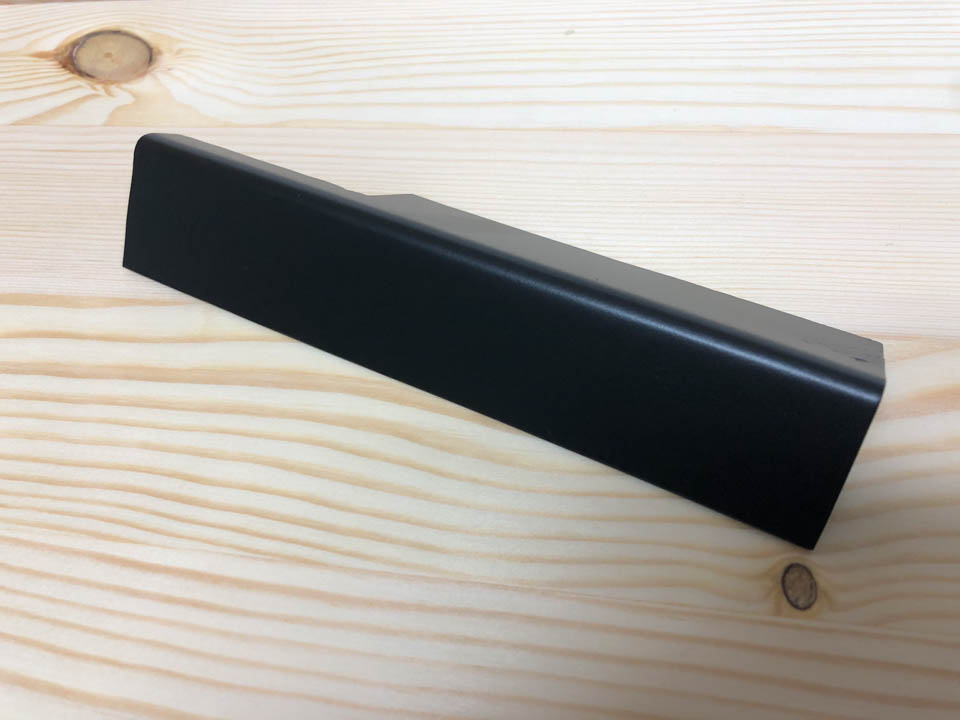
Now when the part is finished I used a deburring tool and just trimmed the edges so they were all nice and clean.
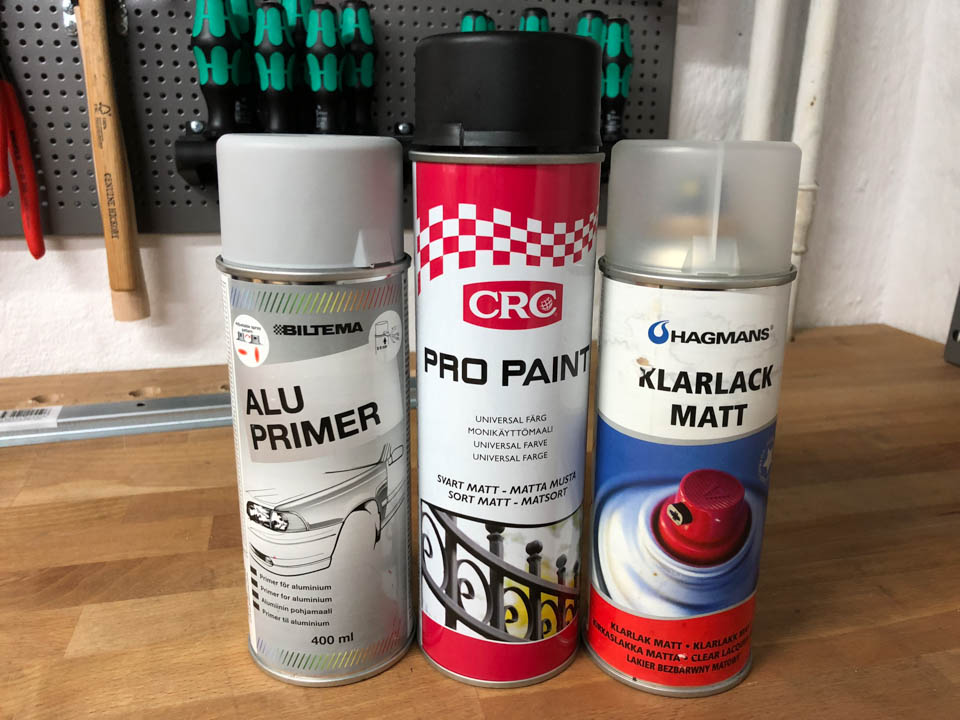
I did not want the IO-cover to be raw aluminium so I spray-painted it black. First I used a aluminium etching primer, then the black paint and lastly a matt clearcoat.
To mount the IO-cover you also have lots of different options, I tend to use 3M’s heavy-duty doublesided tape as it is way enough for holding the IO-cover in place while at the same time making it easy to remove, also you dont see any screwholes.
This is how it ended up looking, it is a much cleaner look in my opinion.
Hopefully this guide helped or was interesting to some of you, if you have any questions, feel free to leave a comment!